
ChatGPT and cyber security, what are the consequences for companies?
9 February 2023
Introduction to Binary Diffing – Part 3
In part 1 we provided a brief overview of Windows patches and their format. Following this, the previous post introduced the concept of binary diffing, as well as some general algorithms and techniques that can be used. In this part, we will show how Windows patches can be diffed using BinDiff.
We are going to start this post by discussing the C:\Windows\WinSxS folder. This folder is the Windows component store and it’s used to support the functions needed for the customization and updating of Windows. Here are some examples of how the Windows Component Store files are used: [1]
Of course, it’s also a HUGE helper for those wanting to diff Windows patches without keeping the system lagging behind in terms of patches. Likewise, the old versions of files don’t need to be kept since WinSxS has the deltas stored separately. It is worth noting that WinSxS doesn’t keep a full or comprehensive history including every level of delta, but it’s good enough to “diff patch changes” for a Patch Tuesday.
With that said, let’s now try diffing a Windows patch. In this case, we’ll grab one of the patches for PrintNightmare: the vulnerability that just kept on giving.
The first step is to download the corresponding patch for KB5004945 [2] for our version of Windows. In this example, it is ‘windows10.0-kb5004945-x64_db8eafe34a43930a0d7c54d6464ff78dad605fb7.msu’. Once we have downloaded the update, it’s just the matter of extracting the content, which can be done by running:
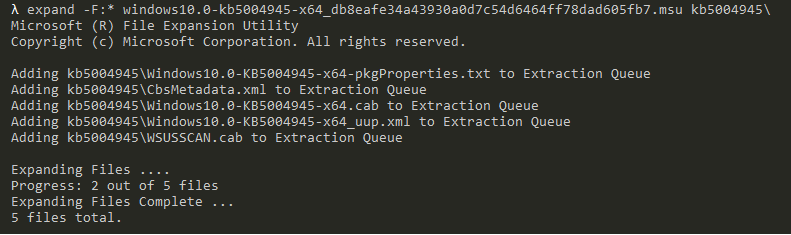
This should be done recursively, so you can ignore any WSUS and SU-related cab files. In the end, you will extract a series of folders that start with ‘amd64_’, ‘wow64_’, ‘msil_’ and ‘x86_’, which are the folders we are interested in. Extracting all of the cab files will take some time and disk space.
If you find running expand over and over again tedious, then you can opt for the path of least resistance with a ready-to-use PowerShell script by Greg Linares. [3] This script should provide a nice folder structure.
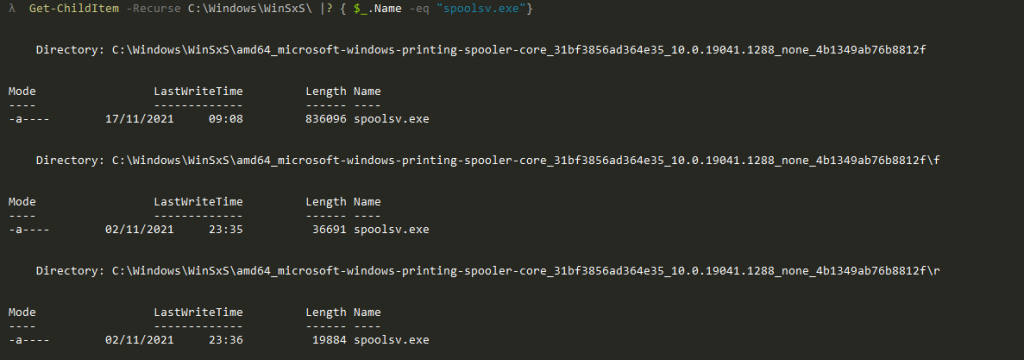
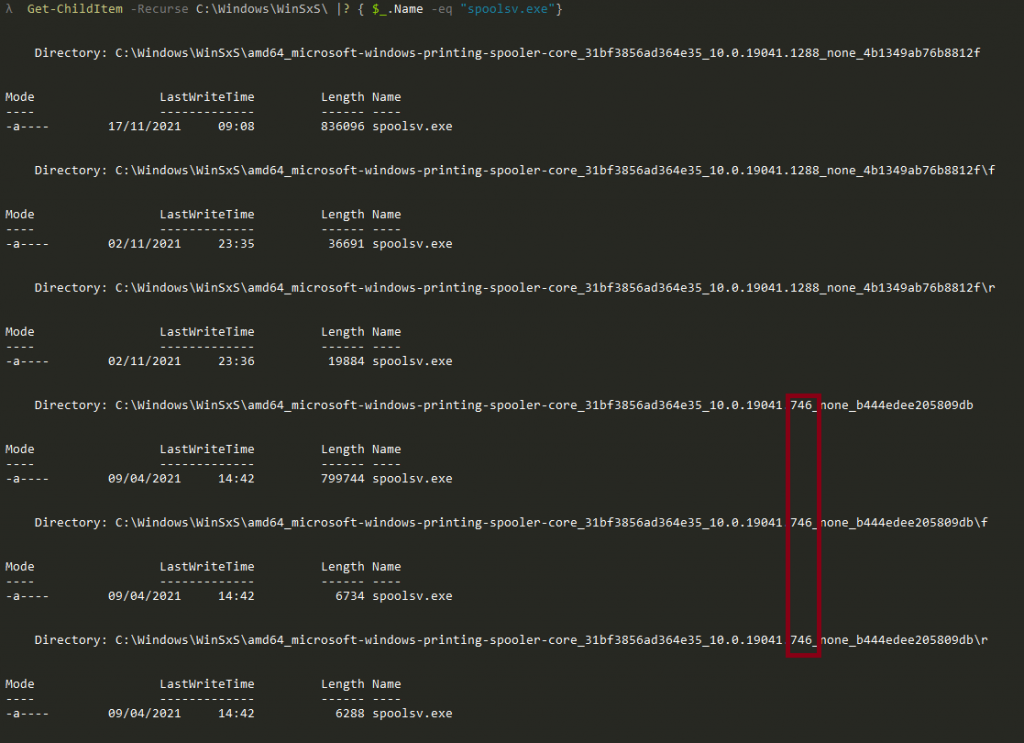
After this, the next step is to acquire ‘spoolsv.exe’. As there is a copy of this executable on our system already, we can start by copying that. If we check the version, it is 19041.1288. But for now, let’s just rename it to ‘spoolsv_1288.exe’. The next problem to solve is getting it back to its base version. But if you remember from the first part, this is done by applying a reverse delta for the version we have. As we talked about earlier, WinSxS will come to the rescue. So let’s search it for ‘spoolsv.exe’, and hopefully we will find the appropriate reverse delta.
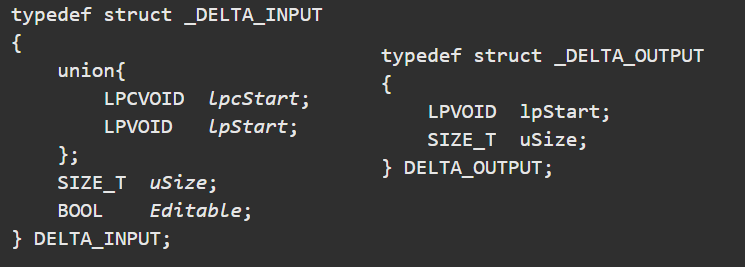
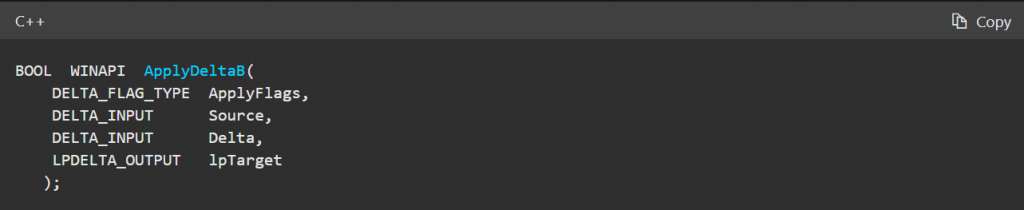
So it’s basically just a call to ApplyDeltaB, where we supply three buffers and have the patch applied to the output buffer. After this, we can then write the buffer to disk, leaving us with the patched version.
The small tool I hacked together (‘patch.exe’) takes 3 arguments:
So now we can run:

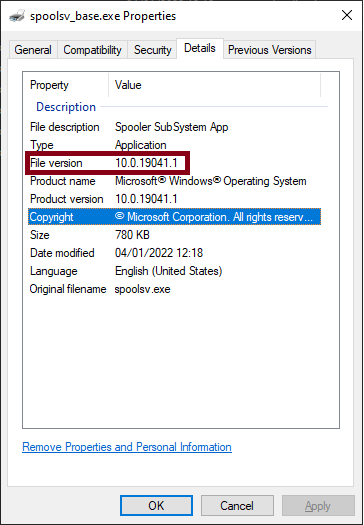
As we see “patch applied successfully”, the patching process was a success and we should now have a file named ‘spoolsv_base.exe’ where the reverse-delta has been applied to our spoolsv_1288-binary. To verify, right click on the file and select Properties. Under the Details tab, we should see that the version is now 19041.1:
From here, we could decide to diff 19041.1 and 19041.1288. However, this is a huge version gap and the number of differences and functions that have been changed would make the task much harder. So as a general rule, keep the versions as close to each other as possible.
Now we want to apply a forward delta to the ‘spoolsv_base.exe’ so that we can get an unpatched version that is closer to the version of our patch. Once again, we can have a look in WinSxS and a bit further down we should find:
Now make sure to pick the f(orward) delta that we will use to update the base version from 19041.1 to 19041.746 by running:

At this point, we might feel tempted to diff the two binaries. Although this is probably fine, we can add an extra step to making the diffing process much easier. We already have the patch downloaded and extracted, and we know this is the patch that fixes the issue we are trying to diff. So all we have to do now is simply apply the forward delta to our ‘spoolsv_base’-executable to get the binary where the patch has just been applied by running:

Now we have two versions that are decently close in range: ‘spoolsv_746.exe’ and ‘spoolsv_1083.exe’. The next step is to select a diffing tool. My preference has always been BinDiff, which is freely available at zynamics.com, but there are others such as Diaphora.
So from here, we can load both files in IDA. Let IDA download symbols, let the auto-analysis finish, and then save the databases.
Next, with the unpatched file go to plugins BinDiff, choose diff database and then select the other IDB.
This will result in a number of tabs popping up. Matched Functions are the functions BinDiff found in both files. Primary Unmatched are functions that were only found in the primary file, and likewise Secondary Unmatched are functions unique to the secondary file.
So in the case of ‘spoolsv.exe’, we have some functions in Secondary Unmatched:

If there was ever a list of five functions that indicated something was not in pristine condition, this might be it!
Let’s check the Matched Functions instead. This highlights what was patched and usually this is where the process gets interesting. Here we can sort by similarity or confidence or by other fields.
You should see something similar to this:

From this view, we can now right click any of the matches. By then clicking ‘View Flow Graph’, this will open the BinDiff gui and display both functions side by side. So let’s try it out with RpcAddPrinterDriverEx:
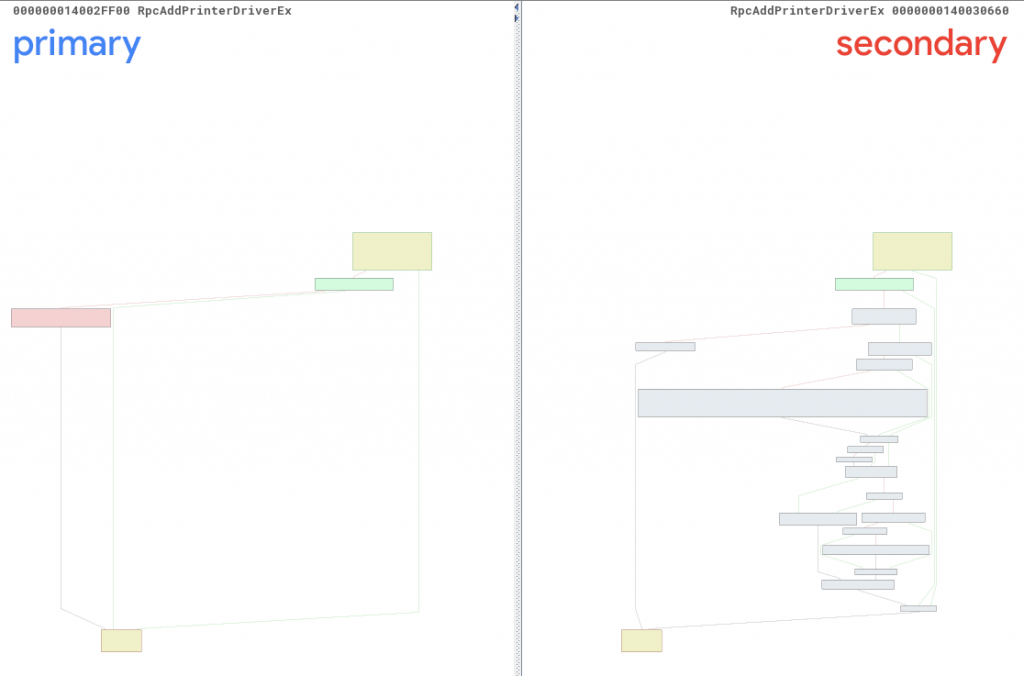
Here you can see two things in particular – first, which blocks changed within the function; and second, which blocks were removed, added and what changed within the block (if we zoom in). Upon closer inspection, it is safe to say something definitely changed!
Let’s take a look at RpcAddPrinterDriverEx in IDA and see if we can notice something that can be assumed to be security-related.
Unpatched function RpcAddPrinterDriverEx:

Patched function RpcAddPrinterDriverEx:
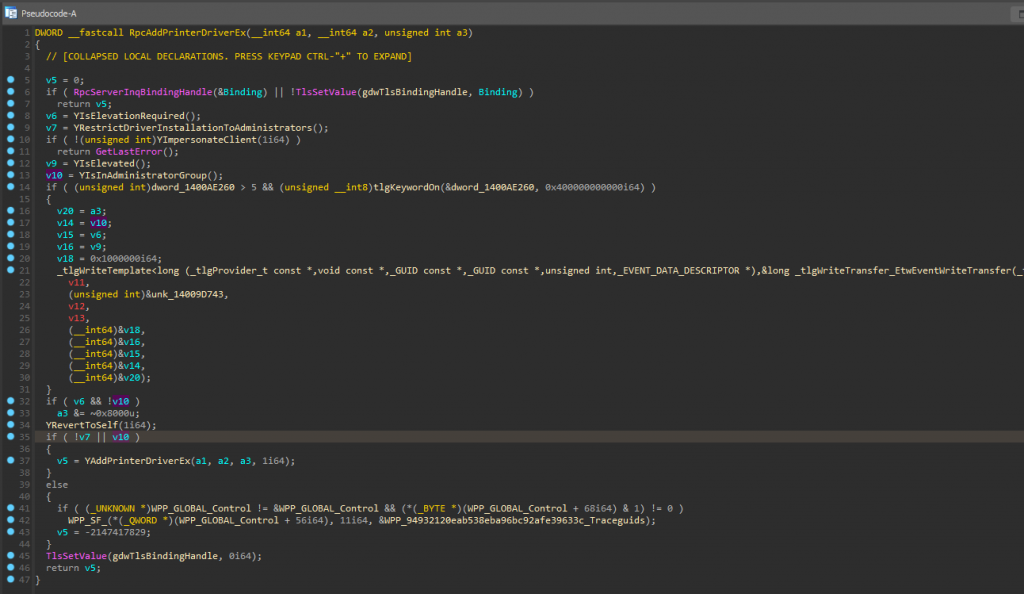
By having a quick look, we can draw the conclusion that Microsoft went from a free-for-all approach to instead adding numerous privilege checks surrounding the rpc-endpoint. In these, the file checks if it should restrict driver installation to administrators, or whether elevation is required. We can also see that the client is now impersonated. This continues running in the caller’s security context to be able to check if the user is elevated and if they are in the administrators group. [7] At this point, it is fair to say that the patched version does at least look better than the unpatched version.
However, we still need to remember that we are only basing this assessment on what we see in the RpcAddPrinterDriverEx-function. So can we be certain that the patch is covering all bases and is actually correct? Of course not! For example, what does the YRestrictedDriverInstallationToAdministrators and YIsElevationRequired check? Can the checks be subverted? What flag is removed from a3 on line 33 and how does that impact YAddPrinterDriverEx? We will leave these questions as an exercise for the reader.
This post, and this series more broadly, was intended to serve as a short introduction on diffing Windows patches. The goal has been to show that patch diffing can be a valuable tool, but also to show that there is no black magic involved! The process doesn’t need to take a long time to narrow down what changed, or to gain some understanding of the potential impact when applying new patches.
Introduction to Binary Diffing – Part 3
References